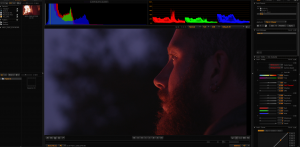
As an editor of mainly DSLR (Digital Single Lens Reflex) camera footage, figuring out an efficient workflow for the unprecedented RED EPIC Camera was at first a little daunting. “5K?! Will my computer explode while processing hundreds of GB’s of EPIC footage?” Nope, everything will be just fine. Assuming you have covered a few bases… (FYI, for those of you who aren’t aware, 5K is a frame size that is basically double the resolution of HD http://www.hdfever.fr/wp-content/uploads/2010/04/redchart.png)
First of all, to see your .R3D clips you’ll have to download (free) the RED Cine-X application. This takes 10 minutes and can be found here: https://www.red.com/ downloads/4fad7fd417ef027cd8000eb1. You have to jump through a few hoops for proper installation but the instructions are very clear and easy to follow.
Using Adobe Premiere Pro, it is POSSIBLE to import the .R3D files into your project just as you would .mov files under File/Import. HOWEVER, you’ll be left to sort through never-ending RDC folders of quadrupled clips and pull each RED file individually into a separate bin – which can be very time-consuming and kind of a pain.
The RED camera separates its files every 4.29GB while shooting in order to avoid any issues in storing and uploading massive files. Of course, shooting a clip beyond 4.29GB is no problem, it’s just that for example, a 13 GB clip, will be stored in 4 separate files labelled .001, .002, .003 etc. These files will appear to be the exact same clip but do not delete any at the source! They are reading media off other cards and are necessary to view the full clip.
So, it is wise to make a habit of importing all .R3D files through the Media Browser (Window/Media Browser.) Here, you will find all your .R3D files sorted for you – no folders with multiple files of the same clip, just a chronology of gorgeous .R3D files ready to import and view.
Hopefully your videographer has taken full advantage of the RED’s capabilities by shooting in HDR (http://www.red.com/learn/red-101/hdrx-high-dynamic-range-video) as well as using its stunning slow-motion of up to 300 frames/second (http:// www.red.com/learn/red-101/slow-motion-video).
BUT, don’t get carried away viewing your unprecedented footage in full playback resolution as this will this ultimately slow the editing process. With RED clips, I set my playback resolution to 1/4 or an 1/8th and only once I’ve completed a fine cut do I treat myself to the full playback resolution – Stunning!

